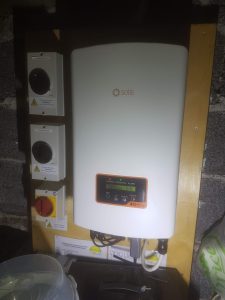
d.c. isolators have black handles
a.c. isolator has a red handle
The short answer to this is, if you’re a reasonably competent DIYer, then yes, you can replace your inverter yourself. However, if you’re unsure of any of the steps or there’s something that doesn’t tally with this guide, do not proceed and instead give us a call.
Please also be sure that it is in fact your inverter that is at fault. Many people jump to the conclusion that it “must be” their inverter, and in some cases they’ve had an unscrupulous sales rep (usually calling themselves an engineer) round who has told them it’s the inverter at fault. If you’re not 100% sure it’s the inverter, please ask us for advice before you commit yourself; let’s get it right first time.
There are no permissions required in order to replace an inverter. The company that manages your Feed in Tariff are only concerned with the solar panels and with the generation meter, they’re not interested in inverter replacements.
Switch off!
Firstly, you’ll need to switch off the a.c. and d.c. isolators. The a.c. isolator usually has a red rotary handle and the d.c. isolator(s) usually have a black rotary handle. Note that not all installations have d.c. isolator(s) and instead have one built into the inverter. Note also that some installations aren’t at all compliant, and if there’s anything that doesn’t fit this description then please get a photo of it and email us.
Disconnecting the old inverter
Next, disconnect the old inverter from its d.c. and a.c. supplies. The d.c. connections are in pairs, and usually they are plugged into the inverter.
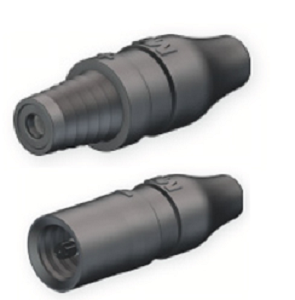
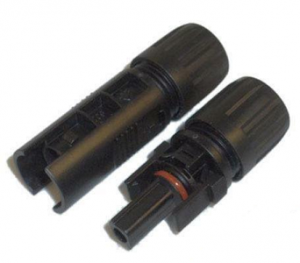
There are four common types of d.c. plug. These are MC4, MC3, Sunclix and Solarlok:
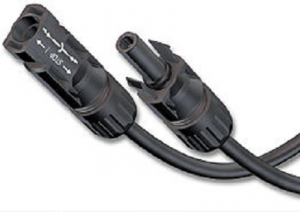
(most common)
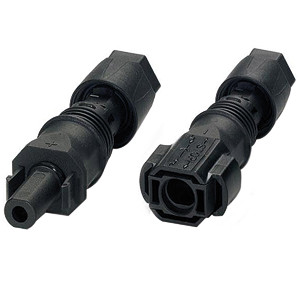
(SMA and some Samil inverters)
(older Power One inverters)
(Delta inverters)
The vast majority of inverters have MC4 connectors. All our inverter models have MC4 connectors too, so if yours are in good condition then they just need to be unplugged. MC4s are locked into place with the prongs of the female connector. These need to be pinched together to release them and allow the plug to be withdrawn. Usually this can be done by hand but sometimes a small screwdriver or other suitable tool is necessary.
If your inverter has one of the other types (e.g. SMA, Delta, older Power One, some Samil, some Eversolar) then the connections need to be changed to MC4s. We have a solution for this as we can supply cables with pre-fitted MC4 connectors. These can be used to replace the cables that are currently in place. It therefore isn’t necessary to unplug non-MC4 connectors if they’re proving awkward to pull out, just disconnect them from the d.c. isolator instead.
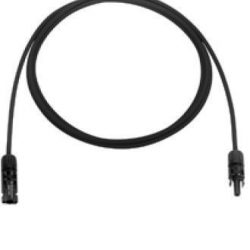
If your inverter has directly wired d.c. connections (e.g. a Fronius model) then you’ll need the separate cables.
The cables, if required, are shown to the right (only available for sale with one of our inverters).
The a.c. (mains) connection to your existing inverter will either be in the form of a plug, or hardwired. If it’s plugged in then it may have a collar to rotate to release it, or it may just require a sharp pull to separate it from the inverter. If it’s hardwired then it will need to be removed from the inverter.
Our inverters all use plugged a.c. connections, and come complete with an a.c. plug in the box. If this plug matches the one already in place, there’s no need to change it, but if not you’ll need to fit the new plug to the cable.
Swap the inverters over
Regardless of the make and model of inverter, you’ll need to remove the old one from the wall once it’s disconnected. Most inverters have a wall mounting bracket which will need to be removed, then you’ll need to fix the mounting bracket for the new inverter to the wall.
Finishing off
If you’ve managed the steps above then simply hang the inverter on its bracket, plug it in and switch everything back on. Note that some of our inverters are fitted with an integral d.c. switch which will need to be switched on.
There is no configuration necessary for our inverters, once power is applied they will start up (daylight permitting of course).